Playing and experimenting with edible media. Sometimes it's pretty. Other times, not so much. Failure is always an option, then eat the evidence. Nom nom nom.
I recently picked up one of Lakeland’s “anti gravity” cake kits by CakeFrame and decided to try to entire their November online contest to win £50 worth of store vouchers. I didn’t win the contest, but it was an excuse to make myself a birthday cake fit for a cake decorator.
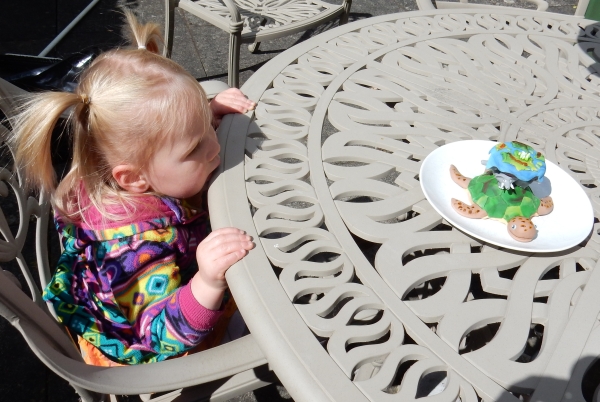
The piping bag is floating as if someone has just paused piping and left it in mid-air.
The piping bag was made out of rice cereal treats, shaped around the plastic stick of the kit with the angled piece sticking out.
Then I covered that with royal icing to smooth it out, let it dry, then covered the whole thing with fondant, shaped a tip, and hand-painted some gel colour to look like a piping bag logo on it. I’ve done this sort of thing before, just not standing upright.
I then made a dark chocolate cake and covered it with dark chocolate ganache and chocolate fondant. I added other fondant accents to look like piping. The cake was slightly too short for where the bend in the tub occurred, so I made some fondant flowers to hide the pipe.
We took some photos to make it look like I was using the piping bag but then able to back away from it in mid-air.
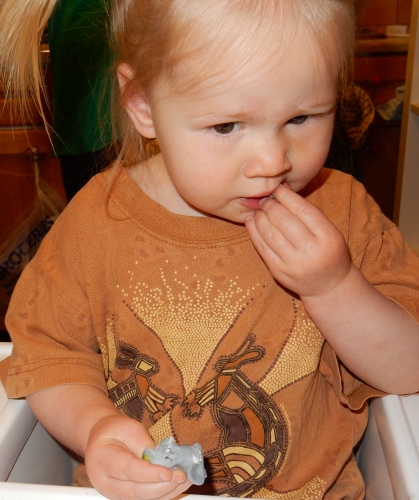
But the funniest photo was this badly overexposed one with my toddler totally photobombing in the background.
I had intended to do a crazy, nerdy gingerbread thing for my husband’s work Christmas party, but I had a colossal failure. So instead I made a BB-8 cake. Which is fine, except I know it’s going to be a fairly common thing this Christmas and going forward. In fact I suspect cake decorators who are sick of Frozen cakes will suddenly find themselves inundated with requests for BB-8s. I hope everyone has sphere pans!
My toddler had never seen BB-8 before. To be fair, I made this cake the weekend before the new Star Wars movie even premiered. So she calls this “ball cake”, and now that BB-8 is appearing everywhere, she keeps pointing at the droid and shouting, “CAKE!” I may have warped her brain.
I didn’t take in-progess photos because I was too busy. If you want a great tutorial on how to make a BB-8 cake (albeit a much, much larger one), see Yolanda’s wonderful video here.
For mine, I used the Wilton Sports Ball Pan for the main cake and the Wilton Mini Ball Pan for the head. I used my recently acquired CakeFrame kit from Lakeland with just the straight piece to stabilize the main ball. The head is affixed with a skewer all the way through the head down into the plastic tube of the CakeFrame, plus three wooden skewers trimmed level to where the head rests on the body. The head has a small piece of foil-covered cardboard at its base, with the whole head then wrapped in fondant. I pre-poked a hole through that cardboard and foil so the skewer would go through easily.
The main coverings are fondant and the accents are modelling chocolate tinted orange or tinted grey and painted with silver food powder. I used the template linked from Yolanda’s site here, but I just printed it as-is and then cut the pieces using circle cutters and freehanding.
The bottom is cocoa powder held in by a fondant rope stuck to the board, and more cocoa powder was used to dust BB-8 all over since he’s a dusty sort of droid.
The eyepiece is covered with piping gel to make it look shiny.
Oh and of course, as is becoming tradition in my house, I made this a certified Christmas cake by sticking a fondant holly leaf and three red sugar pearls on it.
The Christmas party folks were delighted and consumed poor BB-8 before he could roll away to safety.
PS I just realized I didn’t post the first cake I made with the CakeFrame stand here. Hang on and I’ll put that in a separate post…
I recently saw a friend’s amazing gingerbread cookies on social media and asked if she had a tutorial on how to make them. She said she’d just learned the technique at a class by Tunde Dugantsi, whom I noticed had a video on YouTube demonstrating a similar cookie. Tunde has graciously provided Eat the Evidence readers with a unique tutorial on how to make candle holders using her gorgeous gingerbread decorating skills. This is a fabulous holiday project because you can make a batch of dough for some cookies for eating and others to act as table decorations. You can also adapt the instructions to put edible fillings in the cookies instead of candles if you like.
I am a Hungarian gingerbread artist living in the United States. Gingerbread is a living tradition in Hungary and many other European countries. These cookies taste wonderful for months, then dry out and can keep forever as a decoration. They are really attractive, but still easy to make. This is a great family project around the holidays. Let me show you how to make these candle holders.
Cut out six bigger snowflakes (but you can do stars, or circles or any other shape that is big enough to put a candle in the middle).
Bake the 6 cookies. 3 of them will serve as the base of the candle holder. The other 3 need a hole in the middle. Cut out this hole with a circle cutter that has similar diameter to the candle (slightly bigger cutter is fine). While the cookies are still warm and soft, turn them up side down and cut the hole in the middle. If the top is on the surface when you cut, the edge will stay nice and sharp.
Then let the cookies cool completely.
For the decoration, you will need a simple royal icing, which is really easy to make. See my recipe at http://www.thegingerbreadartist.com/2014/08/royal-icing.html. The magic of the symmetric shapes is that you can draw the most simple design, repeat it a couple of times and the whole picture will look amazing. This is the reason I love snowflakes. Let’s see these three designs:
The first design is a very simple snowflake. You repeat the same thing on each tip of the snowflake. Start with a straight line, then draw branches to both sides. Only a few simple lines.
Then add a few dots wherever you see a little gap in the design.
Finally, outline the snowflake. The top part is ready.
For the bottom part, there is not much decorating to do, as only the tips of the snowflake will be visible after assembly. So draw the straight line, and one line on both sides, repeat on each tip, then outline the bottom cookie.
Let the cookies dry.
The second design might need a little practice, but the lines don’t have to look perfect for a nice finished product. Start with two curly curves starting from the middle. Then add three touching tear drops that form a fleur de lis. Add three little dots to the pattern, and repeat the whole thing six times.
For the bottom cookie, just the tear drop fleur the lis is enough.
The third design is using the same basic shapes: start with a curly curve, then add 3 curved tear drops inside and one longer one to the outside of the curve. Finish it up with a few dots. Repeat this pattern six times. For the bottom part I just do three tear drops for each tip.
When all the cookies are dry, you can start the assembly.
Use the icing to gue the parts together. Turn the top cookie upside down, add a thick circle of icing then place it on top of the bottom cookie.
Place the candle into the hole.
Fill the gap between the candle and the cookie with icing dots. It will look like a bead border and hide all imperfections.
You can also use colored candles to match your other decorations:
I hope you enjoyed this project. If you would like some more, check out my book Gingerbread Christmas Wonderland to learn 33 Christmas projects.
Thank you Tunde for your beautiful creations and your generosity in sharing them!
Anyone who wants to take a class with Tunde in person should check out her list of upcoming classes here or use that form to request a class in your area.
Disclaimer: I was sent a free copy of this book for review. I was upfront that I only do honest reviews. All opinions stated here are mine and I have not been paid or compensated other than the free copy of the book.
The short version of this review is that my ten year old daughter absolutely loves Wild Eats and Adorable Treats and I think it’d be a fun addition to any family’s cookbook library.
The book is by blogger Jill Mills of Kitchen Fun With My Three Sons. Mills says in the introduction that one of the boys being a fussy eater inspired her to start making food more fun and engaging by creating faces, animals, and getting her son to participate. Indeed, a common tactic to inspire a fussy eater is to get them involved with the preparing of the food; not only does it allow them to see what goes in – and possibly have a say against elements they don’t like – but the very act of preparing food gives one a mental relationship with the food, which can often be enough to get a fussy eater to try something new.
I know, because I am a lifelong fussy eater, and much happier to eat something I’ve made myself so I know nobody’s put in something I can’t/won’t eat!
The day the book arrived, Peo grabbed it and ran off to the living room to read it while I was still packing up our Austin house for the move to the UK. I told her we’d be making a few things out of the book before we left, but that since I was limited on what ingredients I could buy – as in, I wasn’t going to buy a whole jar of a particular condiment if we were going to end up abandoning it three weeks later – she had to be flexible in which recipes she tried and what ingredients we used.
Luckily for me, Peo’s never been a particularly fussy eater. She has preferences but it’s never been too hard to cater to them. And two-year-old Robin eats cardboard, dirt, tissues, snails, and pretty much anything.
Anyway.
Peo gleefully read through the book, calling out various recipes with excitement and begging to try pretty much all of them in one way or another. We settled on three, which I’ll review below.
Whether you have a fussy eater you want to inspire (or just even feed) or you are looking for fun ways to get the kids involved in some basic cooking, there’s a lot in Wild Eats for all sorts of families. Mills suggests alternatives for some ingredients, but there’s also nothing stopping anyone from using each recipe as a suggestion and then completely reworking it to suit their family’s needs and tastes. It’s clear that Mills wants to inspire precisely that sort of creative freedom for everyone involved, and I like her empowering approach.
A lot of kids’ cookbooks emphasize “healthy” ingredients that are either not particularly healthy (ie brown sugar is white sugar with molasses added back in, but too many moms mistake brown sugar as being less processed and thus think it’s “healthy” when it’s actually considerably higher in calories than white sugar) or are, frankly, kind of gross and not what kids want to eat (ie tofu, which is pretty much just proof of evil in the world as far as I’m concerned).
While Mills does nod towards healthy possibilities for some of the recipes, she states from the outset that her goal here is to inspire kitchen fun, not enforce dietary rules. I find that very refreshing! Instead of healthwashing or pretending that everything she feeds her kids is 100% nutritious, Mills includes a lot of healthy ingredients alongside the fun, tasty, not-so-healthy stuff. If you can get your kid to try a healthy bit because they made an animal design with it using something else they already love, YOU WIN.
Here are the three things Peo and I made:
The first recipe we tried was for Panda Pita Pizza in the Lunch section, which in the book looks like this:
The recipe as written in the book is as follows (bolded comments in square parentheses are mine):
Panda Pita Pizzas
Ingredients
2 pitas
1/2 cup pizza sauce
1 cup shredded mozzarella cheese
10 turkey pepperoni slices
1 slice of provolone cheese
1 black olive
Directions
Preheat the oven to 350 degrees F [180°C]. Place the pitas on a baking sheet. Spread 1/2 cup of pizza sauce on each pita. Place two pepperoni slices on the top sides for ears. Sprinkle 1/2 cup of shredded mozzarella cheese on each pita, covering the edge of the pepperoni that is touching the sauce.
Place two pepperoni slices on top of the shredded cheese for the eyes. Using kitchen scissors, cut out another pepperoni slice into a nose and mouth. Place the pitas in the oven for 10 to 15 minutes, until the cheese is melted.
Cut out two small circles from the slice of provolone cheese and place them on top of the pepperoni eyes. Using a knife, cut out two very small dots from the black olive and place them on the cheese eyes to look like pupils. Place the pitas on a plate and serve.
We changed almost all of the ingredients for this one! I meant to buy whole wheat pitas at Trader Joe’s but accidentally grabbed whole wheat tortillas instead. Whoops. The only package of pepperoni we could find was huge and we wouldn’t get through it before we had to leave the US, so I suggested she could cut slices of ham into whatever shapes she wanted and she liked that idea. She doesn’t like olives so we skipped that part and we didn’t have any provolone so we just went with mozzarella.
Peo cutting face shapes out of the ham using kitchen scissors.
Adding cheese to the pizzas.
Fairly early on she decided she didn’t want to do panda faces, so I told her to go ahead and make whatever faces she wanted. She had a whole backstory for each of these characters. I don’t remember what it is, since again, I was packing an entire household at the same time as getting her to cook this lunch. Plus there was a lot of shrieking from Robin.
Peo’s pizza characters before baking. Very anime-looking.
She was super-excited when they came out of the oven and had to be reminded to wait a moment!
Peo pointing out the facial features on her pizza.
A pizza face, after cooking.
Then I let her cut them with the wheel herself, which she seemed to think was a great treat.
She approached the cutting with a slightly disturbing amount of glee.
Peo declared her pizza faces to be very tasty. On another day we made more, one of which she shaped into a sort of puppy, and one of which was just random.
I asked Peo to type me up a little review of the recipe. She said, “The panda pita pizza was very good but we used tortillas instead of pitas and ham instead of pepperoni. It was still delicious but if we had used the correct ingredients it probably would have been better. I give it a 5 out of 5!”
The next recipe we tried was the one she was most keen on when she first read the book, the Penguin Fruit Snacks, which look like this in the book:
Place 2 black grapes on a toothpick and stand them up on a plate. If the grapes are not standing up, you can cut off a thin slice from the bottom to prevent them from rolling.
Combine the softened cream cheese, sugar, Marshmallow Fluff, whipped topping, and vanilla in a small bowl. Mix well using an electric mixer. Spoon the fruit dip on the top grape for the eyes and add the blue sprinkles for the pupils. Squeeze more dip on the front of the bottom grape for the belly. Smooth out the dip with a knife.
Cut the mandarin orange slices in half and place two on the bottom for feet. Cut the tips off the mandarin orange slices and press the tips on the face under the eyes for the beak. Cut thin slices from the grapes to make wings. You can attach the wings and orange beak with a little bit of the dip using a toothpick.
For this one, I wasn’t keen on Marshmallow Fluff being in the house at all and certainly wasn’t going to buy any just before we left the country. I also wasn’t keen on adding sugar to a “fruit dip”. I asked Peo if she’d like to try it with just the cream cheese and she said she preferred that as well. I’d already packed all of my sprinkles already so we also did without those.
Peo assembling her penguins.
Spreading the cream cheese on the bellies.
Peo’s result. She couldn’t make her penguins stand up and stay intact but said she was okay with that.
Despite some frustrations with toothpicks, Peo had a good time making the penguins and is keen to do it again soon.
Also, she declared that cream cheese on grapes is delicious.
Peo’s exact words when eating the penguin were, “OH MY GOD THIS IS SO GOOD.”
Her typed review is below:
“The penguin fruit snacks are VERY yummy but HARD to make because it turned out that we didn’t have the right length of toothpick and it ripped the grapes so I used cream cheese to aid a half toothpick in holding it together. It worked, on the whole, pretty well and was also EXTREMELY DELISH. We used cream cheese instead of the mixture of things but it was still great. I give it a 4.5 out of 5!”
Lastly we gave one of the breakfast projects a go: the Birdy Breakfast. It looks like this in the book:
In a large mixing bowl, mix together the flour, baking powder, salt, and sugar. Create a well in the center and pour in the milk, egg, and butter. [I assume there’s a sentence missing here about mixing the ingredients together, but obviously you have to do that.]
Lightly spray a large pan with cooking spray. Pour the pancake batter in the pan over low heat in the shape of a tree with one large branch. Lightly brown on both sides and place the pancake on a plate.
Scoop out a handful of frozen has browns and fry them in a pan according to the package directions. Place the cooked hash browns on top of the branch to look like a nest. Cut the hard-boiled egg in half and place the 2 halves on top of the hash browns. Cut out little wings, hair, and a beak from the slice of cheddar cheese and place them on top of the eggs.
Cut pieces of a raisin to make the eyes. Cut green grapes in half using kitchen scissors. Place the grape halves on the end of the branch to look like leaves.
Our major change to this was to use a boxed pancake recipe, because while most of the time our pancakes are my own super-healthy recipe, while we were in the US we were pigging out on Trader Joe’s Pumpkin Pancakes. Also, for ease I just made a big round pancake and had Peo cut it to shape the branch piece.
We also used more of the black grapes we already had on hand for the penguins above. Here’s Peo’s result:
A pretty easy and fun breakfast if you’ve already got hard-boiled eggs in the fridge.
She really enjoyed making it and said she loved eating it too.
Nom nom nom.
Her evaluation:
“It was very good but took awhile. I would’ve had more room for it if I didn’t eat one of the hard boiled eggs as the pancake was cooking. I still give it 5 out of 5.”
In conclusion, Wild Eats and Adorable Treats is a great resource for parents who want to engage kids in the kitchen. It’s fun, flexible, empowering, and engaging. Don’t get it as a cookbook for your shelf, get it for your kids to actually sit down and read as little foodie inspiration. There are even bonus animal fact pages sure to keep your kids delighted as they read through. It’s the kind of book you can hand them and pretend it’s a gift for them, when really if it helps them eat more variety, it’s a sneaky gift for yourself.
Disclaimer: I was sent a free copy of this book for review. I was upfront that I only do honest reviews. All opinions stated here are mine and I have not been paid or compensated other than the free copy of the book.
The short version of this review is that Grandbaby Cakes is a really interesting book full of cake recipes, many of which are modernized versions of classic Southern US recipes. The two I tested were very tasty and on that basis alone I do recommend the book. However, I did find some editing issues that should give beginner bakers caution when proceeding with the instructions.
The book by blogger Jocelyn Delk Adams of Grandbaby-Cakes.com is rich with recipes and delightful family stories drawn largely from the author’s grandmother, referred to lovingly throughout the book as Big Mama. Big Mama’s cakes were the highlight of family gatherings and Adams has filled the book with her memories of learning baking arts first-hand from such a master.
Adams gives a solid introduction to baking techniques, including thorough explanations of her preferences as well as giving readers latitude for their own preferences where applicable. She then takes readers on a journey through pound cakes, layer cakes, sheet cakes, baby cakes (aka cupcakes), celebration cakes, and finally seasonal/holiday cakes, all adorned with photos from her childhood.
There’s an atmosphere of being invited over to family gatherings to peruse photo albums, listen to beloved stories, and eat fabulous food. When you read Grandbaby Cakes, you feel warmly welcomed into a delicious world of homey delights.
My older daughter Peo wanted me to test the recipe for the S’more Lava Cakes and I probably should have while we were still in the US, since it looks like graham crackers will be impossible to find here in the UK. But I wanted to try the Cinnamon Roll Pound Cake and the Cornmeal Pound Cake, so those are the recipes I will specifically review. I’ve promised Peo we’ll make some version of the S’more Lava Cakes someday soon, possibly substituting digestives for the graham crackers.
While we were still in the US, I had access to our big Kitchenaid stand mixer, my bundt pan, and all of the ingredients as listed for the Cinnamon Roll Pound Cake recipe, so I made that first while also packing up the house to move to the UK. In fact, this cake was the last thing we used the Kitchenaid for before selling it to a friend, since we couldn’t bring it with us to the UK (the electrical plugs are different here and not all electronics can be easily, safely adapted).
The recipe is also available on Adams’ blog here, but there are some ingredient and instruction differences. In particular, the blog version calls for 3 teaspoons of baking powder while the book version calls for 1/2 teaspoon of baking soda – a significant chemistry difference. There’s also a lot less butter in the cinnamon swirl element in the book version.
I’m reprinting the recipe below in its entirety as written in the book, as given permission by Agate Publishing as part of the review process. Bolded elements in square brackets are my additional notes, sometimes for international readership with varying measurements, other times to point out elements I believe needed better explanation.
3 cups sifted cake flour [This means you sift the flour into a bowl and then measure 3 cups of it, versus if Adams had written “3 cups cake flour, sifted” which would mean to measure 3 cups and then sift. But this is very confusing to new bakers, and Adams’ discussion of sifting under her “Baking Rules” doesn’t specify. She says she often skips sifting, but 3 cups sifted versus 3 cups not sifted can be a significant difference in total flour amount. I suspect she actually means “3 cups cake flour, sifted” because then the sifting is adding air but not changing the total flour amount. When I prepared the recipe, I sifted flour and measured out 3 cups of that. It worked, but this should be clarified in the book.]
1 teaspoon salt
1/2 teaspoon baking soda
1 cup sour cream, room temperature
2 tablespoons vegetable oil
1 tablespoon vanilla extract
Cinnamon Swirl
1/3 cup (5 tablespoons plus 1 teaspoon) unsalted butter, melted [76 g]
2/3 cup packed light brown sugar
1 tablespoon all-purpose flour
1 1/2 teaspoons ground cinnamon
1 teaspoon vanilla extract
Icing
2 ounces cream cheese, room temperature
2 tablespoons unsalted butter, room temperature [28 g]
1 1/2 cups confectioner’s sugar
1/4 cup milk (can be whole, 2%, or even refrigerated coconut)
1 teaspoon vanilla extract
For The Cake
Preheat your oven to 325°F [162°C]. Liberally prepare a 12-cup Bundt pan with the nonstick method of your choice.
In the bowl of your stand mixer fitted with the whisk attachment, beat the butter for 1 minute on high speed. Slowly add the granulated sugar. Cream together for an additional 5 minutes, until very pale yellow and fluffy. Add the eggs 1 at a time, combining well after each addition and scraping down the sides and bottom of the bowl as needed.
Turn your mixer down to its lowest speed and slowly add the flour in 2 batches. Add the salt and baking soda. Be careful not to overbeat. Add the sour cream, oil, and vanilla extract. Scrape down the sides and bottom of the bowl and mix the batter until just combined. Be careful not to overmix. Set the batter aside.
For The Cinnamon Swirl
In a small bowl, whisk together all the ingredients until well combined. Set aside.
To Bake
Pour 1/3 of the batter into the prepared pan.
Drizzle 1/2 of the cinnamon swirl over the batter. Using a butter knife or skewer, swivel the mixture thorough the cake batter, creating a flourish pattern.
Repeat with the rest of the cake batter and cinnamon swirl. Top with the remaining batter. [This uses the remaining batter twice. I believe Adams meant to say use another third of the batter, then the rest of the cinnamon swirl, then top with the remaining third of the batter. This is why I advocate that newbie bakers thoroughly read recipes first, or else they might pour in the rest of the batter and end up with cinnamon swirl on the surface, not mixed into the interior of the cake.] Bake for 75 to 85 minutes, or until a toothpick inserted into the center of the cake comes out mostly clean.
Let the cake cool in the pan on a wire rack for 10 minutes, then invert onto a serving plate. Let cool to room temperature. Lightly cover the cake with foil or plastic wrap so it does not dry out.
For The Icing
Clean your stand mixer bowl and whisk attachment. Beat the cream cheese and butter for 2 minutes on medium-high speed.
Reduce your mixer speed and carefully add the confectioners’ sugar in 2 batches, scraping down the sides and bottom of the bowl as needed. Once the sugar is fully incorporated, turn your mixer back up to medium-high speed. Add the milk and vanilla extract and beat until the icing is smooth and pourable. [Mine never went perfectly smooth, but looking at the photo in the book, neither did Adams’.]
Drizzle the icing over the cooled pound cake. Serve at room temperature. [And here is a serious omission: this recipe should end with storage instructions that include refrigeration. Icing made from cream cheese and milk should not sit out for more than four hours. While you’ll find a lot of bakers being very casual about this, in terms of regulatory bodies anyone with any kind of food licensing is required to refrigerate a cream cheese frosting. There are multiple national, state, and local regulations pertaining to this. This is why the Austin cake show’s tasting category prohibits such ingredients, because we can’t provide refrigeration and we’d fail an on-site health inspection if we allowed cream cheese frostings to sit out for more than four hours. For the safety of anyone eating your cake – particularly at-risk populations such as small children or the elderly – you should refrigerate leftovers. You can bring the cake back out to warm up before serving again. The book should at least make mention of this.]
I used regular non-stick spray with a flour coating in my non-stick pan, but wherever the cinnamon swirl baked through, it stuck a bit:
The top was very sticky to the touch as well, so it’s no wonder it stuck to the pan. It wasn’t baked on so much as wet-glooped on.
I was able to peel the top out and loosely put it back on the cake, and then pour the glaze so that it helped anchor the top down.
The glaze came out a bit lumpy despite lots of mixing, but it tasted good anyway.
Overall despite some typos in the recipe, this cake was delicious. Everyone in our household loved it. The texture is very fine and it has a good flavour without being overly sweet. I will definitely make this recipe again.
The second recipe I chose to review was the Cornmeal Pound Cake, which I decided would be a good fit for when we first got back to Cambridge because even though the recipe called for using an electric mixer – something I still don’t have in Cambridge but hope to acquire in the next few weeks! – I was reasonably certain I could hand-beat the recipe well enough based on the ingredients. Further, we have a 10-inch cast iron skillet in Cambridge whereas the one in Austin (currently on the shipping container) is a 12-inch.
I also had found cornmeal in the UK already, and noted that it’s often sold as “polenta”. It comes in different coarseness levels and the stuff I had on hand was fairly fine, so I thought it’d be a good test of the recipe to see if it’s flexible enough to handle various types since no doubt the regular cornmeal called for would be more coarse.
I didn’t feel like buying a large container of buttermilk just to use 1/3 cup, so I substituted about 1/3 of a tablespoon of vinegar mixed into 1/3 cup of whole milk instead. This is a standard substitution for buttermilk, and works with lemon juice instead of vinegar as well.
Knowing that I was tampering with the recipe and thus ensuring to evaluate it fairly on that basis, I proceeded. Again, the book version of the recipe differs from the blog version, especially in terms of leavening. The book version also has a honey-butter glaze, which I made as directed.
As above, my notes appear bolded and in square parentheses.
3/4 cup (1 1/2 sticks [170 g]) unsalted butter, room temperature
1 1/2 cups granulated sugar
3 large eggs, room temperature
1 cup sifted all-purpose flour [as above, this means you should sift the flour first and then measure one cup of it, although in this case I didn’t have a sifter so I just measured one cup, meaning I inevitably had more flour in the recipe than if I sifted]
1/2 cup yellow cornmeal
1/2 teaspoon salt
1/3 cup buttermilk, room temperature
1 tsp vanilla extract
Honey-Butter Glaze
2 tablespoons unsalted butter [28 g], melted
2 tablespoons honey
For the Cake
Preheat your oven to 350°F [177°C]. Liberally prepare a 10-inch cast-iron skillet or round pan with the nonstick method of your choice.
In the bowl of your stand mixer fitted with the whisk attachment, beat the butter for 2 minutes on high speed. Slowly add the sugar. Cream together for an additional 5 minutes, until very pale yellow and fluffy. Add the eggs 1 at a time, combining well after each addition and scraping down the sides and bottom of the bowl as needed.
Turn your mixer down to its lowest speed and slowly add the flour and cornmeal in 2 batches. [I assume this meant to mix the flour and cornmeal together and then add half of that, mix, and then add the other half and mix again. But it might mean that I was supposed to add the flour first and then the cornmeal, mixing in between. I’m not sure if there’s an end result difference or not anyway, but it wasn’t fully clear. The blog version is vague as well about whether you should be pre-mixing your dry ingredients, which is a fairly standard thing to do, but it doesn’t make mention of two batches.] Add the salt. Be careful not to overbeat. Pour in the buttermilk and vanilla extract. Scrape down the sides and bottom of the bowl and mxi the batter until just combined. Be careful not to overmix. [Given that she’s warned against overmixing twice, it’d make more sense to have the dry ingredients pre-mixed.]
Pour the batter into the prepared skillet or pan and bake for 35 to 45 minutes, or until a toothpick inserted into the center of the cake comes out clean.
Set aside to slightly cool. Lightly cover the cake with foil or plastic wrap so it does not dry out.
For The Honey-Butter Glaze
Whisk the butter and honey together until well blended. Serve the cake with the glaze spooned over each portion.
Unsurprisingly, the cake looks like cornbread when it comes out of the oven, especially being in the cast-iron pan:
Very nice browning all over for an impressive-looking cake.
This time the non-stick method of my choice was Goop, because Goop is awesome. This was a sticky batter and look how gorgeously and perfectly it popped out of the cast iron pan:
That’s a variance in browning on the bottom…it didn’t stick to the pan AT ALL. My husband and I were incredibly impressed that I could just flop a cake out of the cast iron like that. Goop rules!
I made this in the late afternoon and then served it for dessert after dinner, and everyone in the family really liked it.
A slice of the cornbread pound cake with the honey-butter glaze on top.
My husband and I agreed that it didn’t have as fine a crumb as the cinnamon roll pound cake, and we further agreed that if I made this again with a mixer and a sifter, it probably would. But even without those things, it was quite nice. The finer corn meal does not seem to have made it dry, but I’m going to try to get some coarser polenta for the next time I try it to see what it’s like that way as well.
It’s a really nice dessert version of cornbread. My toddler is currently obsessed with cornbread and cake, so when we gave her some and told her it was both, she made baby-woot type noises, and then shoved it in her face.
It would make a fantastic dessert after a barbecue.
In conclusion, if you’re looking for a really charming, homey, friendly cake recipe book full of interesting Southern-inspired recipes, Grandbaby Cakes is a good buy. Even though it comes from a blog, the recipes have been altered for the book so you can’t just get them all for free on the blog. Inexperienced bakers should be cautious as some instructions are not written as clearly as they could be, but with some common sense, Googling, and careful checking as you go, you should be fine.
When I shared my excitement about realizing just how well Goop (equal parts by volume of flour, vegetable oil, and shortening mixed together) works to release baked goods from pans in the previous post, some friends on social media were understandably dubious about my claims that it worked better than more traditional grease-and-flour methods.
So to be thorough for my own benefit as well as theirs, yours, and SCIENCE, I decided to rotate my owl do some experimentation using my breakfast muffins which had been previously sticking quite badly to my pan.
In the photo below, from left to right, I did the following more standard methodologies of grease-and-flour: vegetable (sunflower) oil spray plus flour dusted on (the UK does not appear to have flour-in-the-spray available for purchase), shortening wiped generously and then floured, and butter wiped generously and floured.
L-R: vegetable oil and flour, shortening and flour, butter and flour.
I then coated all other cups with Goop. The batch I made for the previous post using a 1/2 cup each of flour, shortening, and oil still has tons left.
I baked my muffins as usual, and here were the results:
The Goop-lined cups are on the top row, the oil, shortening, and butter are on the bottom.
The cups using Goop released their muffins with barely a nudge. Crumbs left behind fell off but are not stuck on.
The vegetable oil spray plus flour was terrible, which I expected since it’s what I’d been doing before I found the Goop. The muffin stuck, had to be carefully chiseled out with a plastic knife, and tore at the bottom as it came out.
The shortening plus flour worked very well, though, pretty much just like the Goop. So if you don’t want to make Goop, use shortening plus a flour dusting.
The butter plus flour was better than the vegetable oil spray but not as good as the shortening or the Goop. The muffin did come out with little left behind, but it took a lot of gentle cajoling with the plastic knife, and it did almost tear in the bottom middle. You can see that it left a thin film stuck there.
So the results are that Goop works better than vegetable oil and flour by a lot, beats butter and flour by a bit, but is tied with shortening and flour.
Use this data as you will. I like Goop because it’s fast and easy once you have a batch in the fridge, saving me precious time to write the next blog post…
Update: Check out Mat Brown’s test of Goop! And friends on G+ keep reporting other successes. Haven’t heard anybody not love it yet!
For those who didn’t already know, I spent the last 8 weeks back in Austin. We got our stuff out of storage and promptly re-packed it for an international move. We sold the car, we’re in the process of selling the house, our stuff is (hopefully) on a boat on its way to Cambridge, and we arrived back in Cambridge on Wednesday.
While in the US I agreed to do several product and book reviews, so I’ll be posting those over the next week or so, all well in time for your Black Friday shopping needs while I relax in the UK and instead of coping with Black Friday or Thanksgiving will get to have an actual birthday dinner without being run over by crazed shoppers or holiday goers. Yay!
When back in Austin, we ate a lot of Trader Joe’s stuff including their cornbread mix, plus a lot of Hebrew National All Beef hot dogs, because neither of those brands are available here in the UK. Robin in particular has become a major fan of both hot dogs and, as she calls it, “CORN BLEH!”
So today for the girls’ lunch I tried this Hip2Save recipe for pseudo corn dogs in the form of hot dogs stuck into corn muffins. My mini muffin tin is on the boat, but I have two regular muffin pans here in my UK kitchen; one is old, inherited from the folks we bought our furniture from when we first got over here, and the other is newer but has already been used many times for high-heat applications like the Yorkshire puddings my husband will be making again for dinner tonight.
Because he needed that muffin tin tonight and because my breakfast muffins have already been sticking to both pans something awful, and because the UK does not seem to have the flour-in-the-spray type cans, I decided I needed to do something to make these cornbread muffins today without having them stick in a jackhammer-required mess.
I googled for homemade flour spray and found this I Am Baker post about Goop. It’s basically equal parts flour, shortening, and vegetable oil. The shortening we have in the UK is called Trex which is slightly different than US shortening (and sadly not at all like a T-Rex which would be awesome), but I gave it a go anyway. I made up a batch of a half cup of each ingredient and used my rapidly-disintegrating pastry brush to spread it around the muffin tin (I meant to bring some of my good ones back on the plane, as I did with some spatulas and a ladle, but the guy packing my kitchen got to the pastry brushes before I did so now I have to wait for the boat).
Here is the short form review of Goop:
ZOMG THIS STUFF IS SO AMAZING.
This is life changing stuff, people.
The slightly longer review is as follows:
With something as sticky as cornbread, I expected at the very least to have to use a silicone spatula to scrape them out and leave a layer in the pan.
NOPE.
Check this out…here’s the pan of cornbread muffins (some with hot dogs stuck in for Peo, some with hot dogs cut up for Robin):
Recipe from Hip2Save here, cooked a bit longer for the larger pans. Pretty tasty although I think the sugar can be cut in half next time. I didn’t have buttermilk so I used a tablespoon of fresh lemon juice in semi-skimmed (1%) milk. I used basic Aldi frankfurters which are okay, but not as good as Hebrew National All Beefs, sigh.
And here’s what happened when I merely nudged one of the muffins with my fingers:
THAT SUCKER JUST ROTATED AND FLIPPED. No sticking, no tearing, nothing.
WOW.
Better still, when I went to wash the pan the Goop remnants washed off easily, not all tarry like flour/canola spray.
If I was still in the US, I would never buy flour spray again. Goop blows all sprays out of the water, off the field, and straight into outer space never to be seen again. It’s a fraction of the cost, it only takes a short time more to spread it around (it’s faster than greasing and flouring), and it works so much better than anything else other than perhaps parchment paper. I’ll probably still use parchment paper for larger cakes for stability when removing from the pans, but for all muffins, smaller loaves, etc, I will now only use Goop.
This is going to be a quick little post because we’re in the middle of an international move. But while we’re temporarily back in the US to get our stuff packed up and sent to England, we’ve been eating US foods we can’t get over there, such as Shake’n’Bake for pork chops.
The other day my ten year old daughter Peo had a genius moment, I don’t even mean the whole string theory thing this time. She asked, “Can you shake’n’bake bacon?”
I thought about it for a moment and realized bacon is just another pork product, so I said I didn’t know but that we could give it a try.
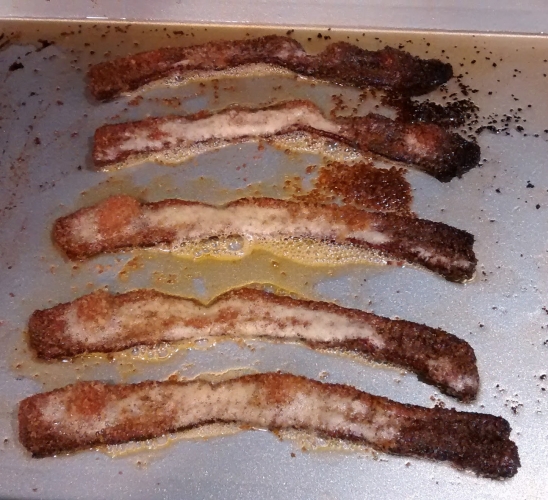
So tonight alongside a pork chop dinner, I took five strips of regular grocery store bacon (supposedly “thick cut” but it’s been years since I’ve seen actual thick slices of bacon from a US supplier) and put them in the Shake’n’Bake baggie the same as I’d done with the pork chops moments before. I used the Original Pork flavour. It took a few extra shakes because they’re long and fold up on themselves, but otherwise no special handling was required.
Then I put them on their own tray and baked them along with the pork chops in a 400F oven for 20 minutes.
It turned out that 20 minutes was a bit long. I should’ve removed them at 15 minutes because they got a bit overdone. But other than that, it actually worked!
You can see the right side is too dark and a bit too much fat has rendered out. Five minutes earlier would’ve been perfect.
It comes out as breaded, crispy bacon. Peo liked them too.
Peo: “Oh my god these are SO GOOD!”
So there you have it. You can totally use Shake’n’Bake directly on strips of bacon. Just don’t overcook it. 15 minutes at 400F/200C for “thick” strips, less time for thin strips, or possibly drop the oven down to 375F/190C.
They’d probably make good dipping snacks for those into that sort of thing.
Be back soon with some other posts since I’ve been given some products to try and books to review while in the US. I also just did a demo for the Austin cake club on a bleeding skull cake, so I’ll post that soon too. Getting to those as fast as I can!
I recently did a demo for my local British Sugarcraft Guild chapter about the 3D Candy Filled Cookies I’ve been making, and someone suggested that one could make a turtle cookie. I told her that was a great idea.
And then I went home, made one, and stuck four elephants and a flat planet on it because Terry Pratchett rules.
Technically that’s three cookies: the base round cookie, the dome cookie on it to make the pocket for the candy, and then another round cookie on top for the Discworld itself.
This project was particularly poignant for me not just because of Pterry’s recent passing, but because the first cake tutorial I ever posted online was for a Discworld cake made so long ago that the photos were taken on film and had to be scanned into a computer. Some of you are young enough to not even understand half of what I just said. Just pretend I’m a dinosaur. Rawr.
Anyway, here’s a tutorial on how to make your very own Discworld cookie!
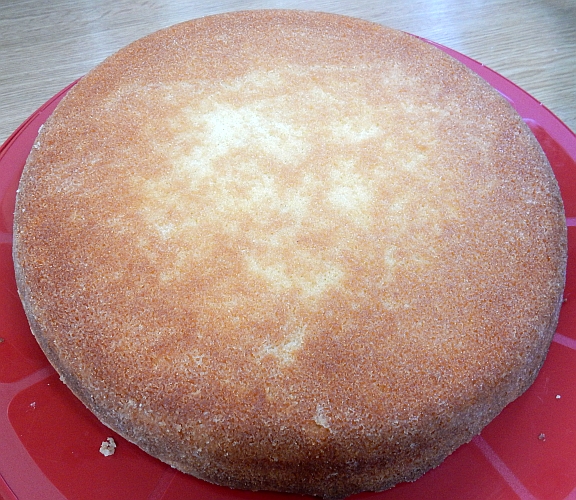
Start by making the base cookie pre-filled with candies of your choice as shown here in the Baseball Cap Cookies Tutorial and have one round cookie the same size as your bottom cookie on the side. In the photos below I happen to have used a completed base that was covered in chocolate on the outside too because I had that leftover from my demo. That’s entirely optional and doesn’t affect the construction of the Discworld cookie.
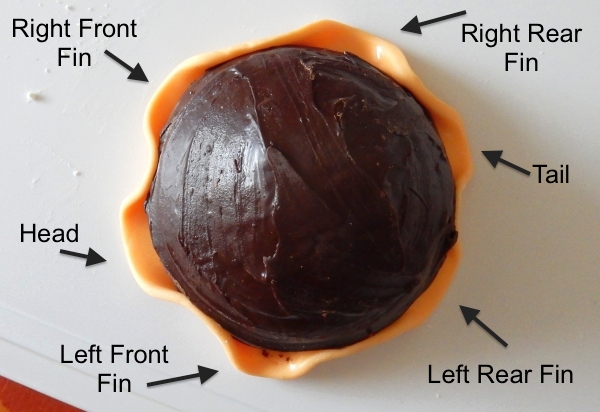
You’ll need one completed base cookie (comprised of a round bottom and a domed top assembled as per the base cookie instructions here) and an additional round cookie.
To make the underside of the shell, mix some yellow food gel into some Caucasian flesh toned fondant. If you don’t have pre-tinted Caucasian flesh tone, you can mix from white with some yellow, a tiny bit of red or dark pink, and a touch of light brown. The colour doesn’t have to be precise as long as it’s differentiated from the upper shell.
How much yellow you’ll need depends on the strength of the colour you’re using. This brand is pretty weak so I had to use a lot. Go a little at a time until you get the shade you want.
When you have a shade you like for the underside, roll it thin and cut a circle wider than your base cookie as shown below.
You want a good 1 to 1.5 cm all around, or about a half inch.
When you’ve got the right size, brush that fondant with water all over, mount the cookie in place in the centre, and then gently fold up sections around where the flippers, tail, and head will be, as shown below.
The tail hole should be small with the largest hole for the head directly opposite so it’s easier to start with those to help you divide the rest into sections. The fin holes should all be about the same size and equally spaced around.
The moistened fondant should stick in place on the cookie if you give it a little push at each of the folded up points.
Carefully flip your cookie over into your non-dominant hand so you can use a sculpting tool, a toothpick, or the dull back end of a butter knife to make width-wise indentations along the shell bottom like this:
These don’t have to be perfect and may not even be seen. In fact they’re probably optional depending on how detailed you want to be.
If you are in a very dry environment or have to pause at this point, place the cookie in a plastic bag or tub while you work on the next bit, but on a corn starch dusted surface so it doesn’t stick. When it comes time to insert the fins, tail, and head, you want that underbelly to still be pliable but not to be glued to whatever it’s sitting on.
Take any spare of the underbelly colour you’ve got, add more of the Caucasian flesh tone if needed, and add a bit of brown/chocolate fondant. This will make A’Tuin’s head, fins, and tail, so you need enough make those lumps. Again, this colour doesn’t have to be perfect but by using some of the same colours you already were, it creates a unified palette. OMG I think I almost qualified for an art degree by using those words in a sentence.
Blending the turtle’s flesh tone.
As you mix, you can ensure you have enough by testing out the next step as you go. Make an elongated, thick patty of the flesh tone and cut it into sections with a large lump at one end for the head, four roughly equal sections in the middle for the fins, and a small lump at the other end for the tail. If you do this and it looks like you haven’t mixed enough, add more and remix until it looks right.
Dividing up the flesh tone for the head, fins, and tail. Pre-cutting like this helps ensure you have what you need and won’t run out of your custom colour mid-fin. It also helps ensure the fins all have about the same amount of fondant which will make sculpting the same size easier later.
Next, shape the body pieces. Roll the head into a ball for now. Roll the tail into a short, tapered snake. Roll all of the fins into long tapered snakes, and then pinch out one side to form the fins. Be sure to make two right handed fins and two left handed ones. See the diagram below for how to shape the fins.
Starting from the lower right corner and working clockwise: make a long tapered snake, pinch out one side, flatten the whole thing slightly, then smooth it out and curve the tip towards the back of the turtle.
Place the fins and tail into position on the gaps you left in the underbelly, moistening the body end of each part as you go to help them stick to the underbelly and the cookie. You may need to gently widen the gaps to accommodate the body pieces and then pinch them back closed.
Make sure the underbelly is firmly against the pieces to help hold them on.
Press some of the fondant from the tail and each firmly against the cookie, slightly smushing it in and upwards as you go to really anchor those pieces on.
Work that moistened fondant right up hard against the cookie to make sure it sticks. That’s a lot of weight hanging off to the sides so you need to maximize surface area contact where you have it.
Gently roll the head ball between your palms to give it a bit of a tapered, tear-drop shape.
This forms a bit of a neck but also gives you material to smush onto the cookie because again, you need this connection to be strong.
Use a ball tool to make gentle indentations for the eyes and a sculpting tool, toothpick, or blunt back of a knife to indent a mouth line.
You can make him smiling or not as you prefer. The gap will close a bit as you handle the head to mount in on, and you can also smooth it with your fingertips if necessary.
As with the body pieces before, place the head into position, press the neck end firmly onto the cookie so you’re actually smushing some of the fondant over the cookie itself, and bend the underbelly up around the neck as required.
See how the neck is really pushed and spread onto the cookie to help hold the whole head in place.
Test lift the cookie carefully at this point. If any of the pieces look like they’re going to break off, pinch-smush them more tightly up against the cookie. You will be putting the shell over these smushed sections so don’t worry about how they look, just that they’re a good, tight, strong fit. Because you won’t convert nearly as many people to your new space turtle religion if the turtle’s head keeps falling off. I mean you’ll convert some, sure, but only in a very small god sort of way.
Once you’re sure the parts are on firmly, set the cookie aside on a corn starch dusted surface so it doesn’t stick. Alternatively, if you’re unable to get the pieces to stay on and want to serve the cookie mounted on a plate or board, set it on that plate or board now. This is a good choice for kids or beginners who would be heartbroken if it fell apart when lifted, or if the piece will need to be transported before it can sit overnight to dry (ie if you’re making these at a Discworld-themed cookie craft party, which would be an AWESOME PARTY and please invite me because if you’re the sort of person who would host such an event I want to be your friend).
Next: on with the shell!
You can go with straight green, brown, or whatever colour you think is best. A’Tuin is supposed to have a well-scarred shell from eons of meteorites, but that’s a bit complicated at this scale. I like the look of a marbled shell so I’ll show you how I made this one with various shades of green and brown, but if that’s too complicated go with a single colour.
To mix the marbled colour, start with balls of two shades of green, brown, and yellow. For the green here, I used the pre-coloured Renshaw green but added some green food colouring to one ball to deepen and darken it.
Adjust the relative sizes as desired. Just make sure you have enough that when you roll it out flat, there’s enough to cover the whole cookie.
Roll each colour into several long snakes and line them all up randomly in a row, pressed together, like this:
Some curving will happen naturally since the ends of your snakes are thinner than the middles. Go with it; this will just help add to the curves in the final result.
Use a rolling pin to roll the snakes flat together, rolling lengthwise along the snakes. Fold the rolled fondant back on itself and roll it out again. Do this one or two more times until you have a stripey bit of fondant with the colours starting to blend together.
Gather the piece into a ball but taking care not to overmix. Roll that ball out very thin over corn starch so it doesn’t stick to your rolling surface. Look at both sides and decide which marbled surface you like better and turn that one upwards.
I liked this side because it had some strong brown bits but also a lot of nicely blended yellows and greens.
If you happen to have hexagonal mini cutters, that will make the next step easy. If not, you can just cut hexagons roughly with a sharp knife. Either way, chances are your cookie is not enough of a perfect sphere for hexagons to line up precisely, so you’ll be patching in various shapes as you go. Remember that A’Tuin is a giant space turtle, so nobody’s going to judge you for imprecise shell placement!
Start with a hexagon in the top at the middle (attached with a bit of water or if necessary, a bit of water with corn syrup/golden syrup), and then make six more of the same size and place them around the edges of the first. Gently press them out to fit together as well as you can and where necessary, take a spare bit of your marbled colours and press into place to cover any gaps.
Make more hexagons and work the next row, adding extra bits as needed, and trimming the hexagons as you bump up against the underbody. Pinch the underbody and top shell bits together as you go around to firmly connect them; this will also help hold the fins, tail, and head in.
Start with a top central hexagon and then work your way down to meet the underbody, smoothing the pieces and filling any gaps as you go.
Once the shell is done, you can add final details.
You can bring out the mouth line by painting in a very watered-down bit of brown food gel, and then immediately wiping off the outside area around the mouth. This isn’t required, but can help the mouth stand out a bit.
Make eyes by forming two small balls of white and pressing them into place with a tiny bit of water in the indentations on the head. Then make two very small blue dots, pinch them flat between your fingers, and apply them to the whites with a bit of water. Repeat this with even smaller dots of black, centred on the blue. Then add a single white sprinkle or a tiny dot of white fondant as a highlight to the eye.
Be sure to position the eyes so they’re looking in the same direction or else A’Tuin will look like Cookie Monster. Which is a whole different religion, I’m sure.
For the spots on the head and fins, first put a drop of yellow food gel on a food-safe palette (an old margarine tub lid is perfect for this!). Add a drop of water and mix it a bit, but not completely. Use a brush to dab this rough yellow mix randomly over the head and fins.
Next add a drop of brown food gel and repeat the steps with the water. Using the same brush you had in the yellow without rinsing it, dip it in the brown and dab that on top of the wet yellow spots you just painted. Don’t worry about perfect overlapping: the idea is to have them slightly off-centre so there’s a visible yellow bit and brown bit to each spot.
Note how the spots vary in size and relative amounts of the two colours. This makes them look more natural. It also makes it easy for you to plonk ’em on quickly without worry.
That completes the turtle portion, so next we can move on to the Discworld itself and the elephants!
For the water on Discworld, take some light and dark blue fondant and marble them roughly together.
Use much more light blue than dark so the dark is just giving a hint of waves and not dominating the piece.
Roll out the blue mixture thinly. Lightly place the cutter you used dull-side down on the blue to estimate where the edges of the cookie will be, and then cut a wobbly, wide edge so that there will be “drips” of water flowing over the side of the cookie.
Follow wave lines where they naturally exist to enhance the watery look.
Affix the water onto the cookie using a bit of water and corn syrup/golden syrup.
Position the cookie on an elevated surface that is smaller but still stable so the “drips” can hang down over the edge to firm up. I used a little ramekin. You could also use a bowl, a cup measure, etc. As long as it’s not going to fall over and still gives room for the “drips” to hang freely.
It’s okay to leave bits of the cookie edge exposed and other bits over-covered. That enhances the look of water flowing over the edge.
Refer to a Discworld map to make an approximation in miniature on the cookie. I actually went by my old cake because that was already reduced down in complexity while retaining some of the key features such as the central mountains and the main continents.
For the continents, shape flattened little blobs of leftover green/brown turtle shell mix and affix them into place with some water. Then dab-paint them a bit of red and/or brown gel colour to add some highlights. For the mountains, make white tear drop shapes and press-smush them into place with a tiny bit of water. Drizzle thinned out green and/or brown over them and then wipe the tops clean back to white.
This doesn’t have to be perfect at this scale. Only the worst pedants would criticize an awesome 3D candy-stuffed Discworld cookie, and my rule is PEDANTS DON’T GET COOKIES.
Set the Discworld aside to dry as you start work on the elephants.
The elephants actually need to bear some weight and not fall off of the cookie. Further, given that this is a cookie, you really want to avoid internal structure, especially inedible structure. On a cake you could have the elephants hiding dowels, but here I recommend against trying to use toothpicks or even dried spaghetti as supports because you’re going to have to embed those in the cookie and that’s going to be very difficult to do without cracking it.
What’s better is to make the elephants strong themselves, and that means being made out of a single piece of fondant instead of making bodies, legs, and heads all separately. Think about it: if you’ve got to dry a body on top of legs so it doesn’t slide off, you’ll need many more days for this project, each point of contact is a potential point of failure, and you’ll have to do a lot more work.
I realized as I was typing up the instructions for how to make the elephants that it’d make more sense in a video. If you want to skip the long video, follow the photos below instead.
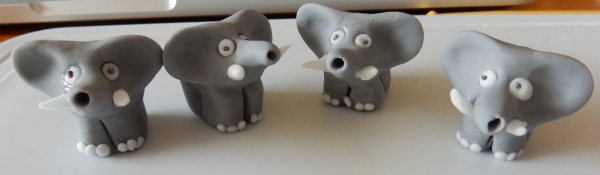
Mix up some grey fondant, divide it into four equal chunks, and roll them each into a ball about one inch or two to three cm big. Pinch the bottom of the ball lightly to make a sort of mushroom shape as shown in the photo below. Pinch out the ears at the sides and then a trunk in front.
First steps of making a one-piece mini elephant.
Continue pinching out and smoothing the shapes until you have rounded ears, a smooth trunk, and a pulled-out body ending in a tail. Use a blunt knife tool (or the back of a regular knife) to indent around the base to make legs, but do not cut through.
Shaping the elephant.
Put your thumbs in the ears and gently round them, pinching out the edges very thin. Roll the trunk gently in your fingers to round it and stretch it. Use a mini sculpting tool with a blunt end (or a toothpick if you don’t have the tool) to gently poke a hole in the trunk.
The elephant before details are added.
Use a small ball tool (or the rounded end of a paintbrush) to indent for the eyes, and then the same tool you used on the trunk to make indentations on either side of the trunk for the tusks. Let the elephants firm up for a few minutes but not dry thoroughly, as you need them to remain flexible for assembling the final cookie.
I should totally make some kind of horror movie with these. THE DAY OF THE FACELESS ELEPHANT ZOMBIES.
Next, make tiny white eyeballs and insert them into the indentations with a bit of water. Make tusks by shaping tiny bits of white fondant into elongated snakes and gently put them in place in the openings on either side of the trunk. If you’re having trouble shaping them, use a damp (not wet) paintbrush to help you push them where you want them to go.
Make pupils out of small bits of black fondant, dark sprinkles, or poppy seeds and stick them on with a tiny bit of water. I used poppy seeds for these ones and it gave them somewhat startled expressions, which amused me.
Finally, make super teeny tiny white balls and affix them to the front of the feet as toes. Since the fronts of the back legs aren’t seen, you can just do the front feet, or perhaps one toe to the side on the back feet if you wish.
Say hello to your four little elephants!
Berilia, Great T’Phon, Jerakeen, and Tubul. Did you know the Discworld elephants have names? I did…because I just Googled and found a wiki. Yay interwebz!
Now you should have your turtle, your Discworld, and your elephants all ready. It’s time to assemble everything together.
Paint the top of the turtle’s shell with a bit of water to make it nice and sticky. Position the elephants so each is facing a quarter turn differently than the one before it, as shown below:
Remember, they’re walking around in a constant circle so the position doesn’t have to be perfect so long as it’s fairly even.
Brush a bit of water between where the tail of one elephant touches the side of another. Gently press the elephants in towards each other so the tails stick to the sides. Smear a bit of the tops of the tails onto the sides as shown in the photo below. That sticks them all together which helps strengthen the whole unit.
Sticking the elephants together in a way that won’t be seen once the Discworld is on top.
Lift the Discworld cookie over the elephants but don’t set it down just yet. Give it a look over and decide which way you want it oriented, taking into account where the “drips” are relative to the elephants’ faces that you want seen. Hold it right over the elephants and look underneath to get an idea of where the ears are going to touch the underside of the cookie.
Move the cookie back to the side and make some small snakes of very moistened fondant. Smush those on the underside of the cookie about where the ears will touch. These should be sticky, gummy lumps on the underside.
Gently push the cookie down onto the elephants so the sticky lumps mush onto the tops of the ears. Give it a gentle twist back and forth a few millimetres as you push it down to help it really stick. Take care to look all around the cookie as you go and make sure nothing’s falling apart, leaning to the side, cracking, etc.
Once the cookie is in place, leave it to dry and you’re done!
All of the cookie parts assembled and drying together.
If you let it dry overnight, it should be solid enough to move around the next day. Because as we all know, the turtle moves.
Right side view.
Rear view. I particularly like how freaked out this elephant looks with his tiny poppy seed eyes.
Delight your family and friends with your epic creation!
“I have no idea what this is, but I want to stick it in my face.”
And don’t forget to EAT IT.
“Hey now, why is that kid coming at us with a knife?”
Peo did approach the dissection with a slightly disturbing amount of glee.
“I felt a great disturbance in the Force, as if millions of voices suddenly cried out in terror and were suddenly silenced. I fear something delicious has happened.”
Who knew space turtles have mini Smarties for guts?
Slurrrrrrrp! (I’m now having eerie memories of playing Violent Venable in a high school production of Suddenly Last Summer.)
We gave one of the elephants to Robin.
She hugged it. D’awwww.
She ate the Smarties but kept hugging the elephant, completely not interested in eating it.
But then eventually she gave in and ripped its face off.
And then decided sugar elephants are not tasty, so she threw the rest on the floor. Poor elephant!
Now go forth and make your own Discworld cookie! Then rip it apart and eat it! BOOYEAH.
That’s right, I said cubed bacon. Not sliced or crumbled, but cubed.
Because I’ve been getting this wonderful smokey, salty bacon from Radmore Farm Shop down the street, and sometimes it comes super-thick cut like this:
Nearly 1/4″ thick, this tasty bacon cooks up super-crispy on the outside with a tender, juicy interior.
It occurred to me that if only I could get an uncut lump of the bacon, I could cut it into thicker cubes in order maximize this crispy-juicy relationship. So I asked at the store and they’re more than happy to take orders for custom cuts of meat. I asked for a large chunk about a few inches thick, and boy did they deliver!
What 728g or just over a pound and a half of uncut bacon looks like.
That’s a huge slab of meat! It even still has the skin on it which I could have made into crackling but nobody in this house likes it enough for the effort.
Here’s the label for anyone who wants the precise details:
That’s about US$7.65 by today’s exchange rate, so a really good price for that much small-family-farmed pork!
I wanted to make a dinner dish that would highlight the smokey, salty flavour of this bacon but not be too heavy, so I decided to put it together with some noodles, some of the nice asparagus that was in peak season that week, and some mushrooms which always go nicely with bacon and don’t add many calories themselves. I didn’t want a sauce that’d destroy the crispy bacon, so I opted to just put a bit of cheese in to liven up the noodles.
So to start, I removed the skin from the bacon and then cut the slab as follows:
First I cut the whole thing in half lengthwise.
Then I cut each half in half for thick quarters.
I should have drawn a picture so I could say I had it drawn and quartered, heh heh heh.
Anyway…
Then I cut each quarter strip into three segments of as equal thickness as possible, given the sloping ends from the curve of the meat.
Then I cut those strips into evenly-sized pieces, which yielded pretty good three-quarter-inch cubes.
I put them all into my 12″ nonstick pan. It was a bit crowded and I considered only putting half in and freezing the rest but wasn’t sure how much it’d shrink up. But given that we ended up with some leftovers and frankly this dish doesn’t reheat too well, next time I’d halve the recipe (at least until Robin’s old enough to partake) and freeze half of the cubed bacon.
iPhoto decided one of these cubes needed a name, so I decided to call it Wilbur because I am a horrible person.
I set that to cook on medium-low setting so the browning would happen slowly enough to still allow the insides of the cubes to cook.
Meanwhile, I cut up a bunch of asparagus (about 250g or 8.8oz worth) into medium-sized chunks.
I weighed it because blog recipes require measurements but really, put in as much as you like of whatever you like.
And I diced up about 280g of white mushrooms.
iPhoto is obviously feeling lonely, so I’ll name this mushroom chunk Mycroft.
I also boiled up 150 g (three nests) of medium-wide Chinese egg noodles, as per the package’s directions for al dente/stir-fry, but about the same amount of any pasta would do.
As the bacon browned, I turned it regularly with a spatula, ensuring as I went that every side of every cubed touched the pan at least a little bit for maximum browning.
Oh hai, Wilbur!
Once it was thoroughly browned on all sides, I took it out with a slotted spoon and set it aside.
That’s some pig!
I cut one of the cubes in half to check that it was cooked through, and it was bubbling hot inside so I felt reasonably sure that it was. But it was still super juicy in there too, so my experiment had turned out as hoped!
Crispy on the outside, juicy on the inside (it’s pink but not raw, it’s more like salty ham)…this is bacon on a whole new level of awesome!
I drained most of the fat out of the pan into a reserved bowl for another time but was sure to leave all of the brown bits in the pan. Then I tossed in the mushrooms on the bottom to start cooking first, with the asparagus on top so it’d steam a bit from the mushrooms releasing their water.
Mycroft is hiding in this picture.
Once there was visible water in the pan from the mushrooms, I added a cup of chicken stock, let that heat to boiling, and then mixed the veggies occasionally until the asparagus looked bright green and enough liquid had cooked away that there was just a thin layer of it in the pan.
Oh hai, Mycroft!
Then I turned the heat down to low, put the noodles in the pan, and tossed them around to mix up the flavours and let the noodles absorb what little liquid remained.
The noodles wanted to stick together a lot, probably to avoid being named by iPhoto. Or it could be that I really need my kitchen stuff from our Austin storage unit so I can have a proper pasta server again!
Next I added about a cup of grated Parmesan (the good and proper Parmigiano Reggiano stuff, don’t waste your time with shelf-stable fake cheese!) and tossed again on low heat just enough to let the cheese melt and mix in.
This amount of cheese gives the noodles a rich flavour without overwhelming the dish.
Once the cheese was incorporated, I turned off the heat and put the bacon back in the pan.
Wilbur, Mycroft. Mycroft, Wilbur. I hope you’ll be the best of friends for the short time you have remaining.
Another quick mix and voila, cubed bacon dinner!
This combination of flavours was awesome, but feel free to add or substitute your own preferred ingredients!
Even Robin approved, especially of the long noodles.
“Can’t talk, Mummy…eating Wilbur and having the beloved childhood stories of my future destroyed in advance.”
Cubed Bacon With Asparagus, Mushrooms, and Noodles
If you can't get uncut bacon to cube, regular or thick-cut will also do but won't be quite as special. This recipe serves four generous portions and doesn't reheat well so halve it if it's too much for one sitting. Feel free to change any of the veggies by season or preference.
Author: Kimberly Chapman
Recipe type: dinner
Cuisine: Bacon
Serves: 4 large servings
Ingredients
One large lump of uncut bacon (about 0.72kg or 1.6lbs) or equivalent in regular or thick-cut bacon.
250g or 8.8oz asparagus
280g or 9.8oz white mushrooms
150g (3 nests) medium wide egg noodles (I used Blue Dragon)
1 cup chicken stock
1 cup grated Parmigiano Reggiano
Method
Remove the skin/rind from the bacon if it's there. Use for another recipe or discard.
Cut the slab in half lengthwise, and then each half in half so you have quartered it.
Turn each quarter on its side and cut into three equal-width strips.
Cut each strip into equal-width pieces to yield approximate cubes.
Place bacon in a pan on medium-low heat and brown on all sides, turning as needed to ensure complete browning.
While bacon cooks, trim any dried ends from asparagus and cut into chunks, approximately thirds for each stalk. Also chop the mushrooms into large chunks.
Boil the noodles as per package directions for al dente or stir-fry. Drain and set aside.
When the bacon is fully cooked, remove into a bowl with a slotted spoon and set aside. Drain most of the fat and reserve for other recipes in the future. Leave a little bit of fat and the brown fond bits to flavour the vegetables.
Place the mushrooms in the pan and the asparagus on top. Cook for 2-3 minutes on medium-low heat until mushrooms start to give up their water.
Add chicken stock to pan and increase heat to medium so the stock boils. Cook for a few minutes, stirring frequently, until asparagus is bright green and most of the liquid has boiled off.
Add the cooked pasta to the vegetables and reduce the heat to low. Toss to coat the noodles in the remaining liquid and fond.
Add the cheese and toss again to mix thoroughly. Cook for about a minute, just until cheese is melting into the pasta.


