I don’t take cake orders. I don’t have a regular business, so pretty much if I’m making a cake for someone, it’s because it’s a charitable effort I support, a close friend, or in exchange for some other favour. So when a friend brokered a deal whereby her other friend, an astronomer, would come to my kid’s party to talk about real space science in exchange for me doing a cake for his kid, I was okay with that.
When I found out that the other kid wanted something about rats and maybe zombies, I was intrigued.
When I asked if they wanted a zombie rat and the mom said yes, I was happy.
When I hesitantly suggested that, if it didn’t offend them, I could get moderately gory and even make the thing bleed when cut and she said that’d be great, I was elated.
When I pushed further and said, “No really, I can make this super-gory if you want,” and she told me to go for it because her kid was now basing his entire party on the idea of having a gross zombie rat cake, I grinned a delightful grin of cakey horror.
Muahahahahaha.
Being the proper sort of evil scientist that I am – or at least play on the internet – the first task was to run some tests on how to make a capsule of edible blood inside a cake that would rupture and bleed when cut, all in a food-friendly manner. I posted previously about the recipe for fake, edible blood I assembled based on several other recipes I found online, so I already had a bowl of that made up. Next, I made a cylinder of spare modelling chocolate and mostly filled it with the fake blood:

If you’re not cackling at least a little bit as you pour fake blood into your modelling chocolate, you’re doing it wrong.
Then I folded in the top and sealed it up, which was really easy to do with the modelling chocolate:

“Able to seal blood into a chocolate tube” was not a skill I ever expected to be able to list on a resume, but there you go.
Next I took some leftover cake from the Alien Dog (left over mostly because we all ended up ill after Peo’s party so most of the leftover cake didn’t get eaten) and put it all around the capsule, including some chunks of fondant:

There are so many reasons why PETA hates me, and remnants of Alien Dog skin being used for bloodletting experimentation is merely one of them.
Then I sliced through it all with a serrated knife as if I was cutting cake with a blood-filled capsule inside, and it worked! Slowly, but it definitely bled!

Again: cackling is required or you’re not doing it right.

Checking the knife: does it have a good horror-movie motif going? Is this something that would be suitable for Dexter’s birthday? Yup and yup! Woot!
Knowing that not everyone is into modelling chocolate, I decided it was worthwhile doing a test of a fondant capsule. I made one the same way, although the end didn’t smooth together quite as well just because of the nature of the medium:

Fondant doesn’t blend as well as modelling chocolate so it was more fiddly to get this one closed.
I then let that one sit overnight to see if it would leak or if the colour would penetrate in any way. I had been reasonably certain that the fat in the chocolate would keep the fake blood inside, but I wasn’t sure if it’d soak through fondant or not. It turned out that it doesn’t, so you can definitely use fondant to make a blood capsule as well. Just be sure to have it fully sealed up. It cut and bled the same as the modelling chocolate:

The fake blood flows just as well out of fondant.

If there was any absorption into the fondant, it was minimal as you can see here. The only other major difference is fondant will dry on the outside and stay soft on the inside, whereas modelling chocolate will stay soft unless refrigerated. Tailor your choice of medium to your particular needs.
Once the tests were done and I was reasonably certain I could make the thing bleed when cut, it was time to start the actual cake!
I happened to win some diamond-shaped pans in a Bake a Wish raffle recently and I realized they were inherently rat-shaped. Well okay, normal people don’t look at a diamond that way, but you didn’t come here for normal, did you? No. I didn’t think so. A rat is pretty much a pointy head that extends out to a wider backside and then tapers back quickly to a tail, so the diamond fits with minimal cutting compared to a rectangle.
I did a double-mix of a vanilla cake with some Americolor Super Red added, put most of it in the 15×11″ diamond and then a bit in the 10.25×7.4″ one. The smaller was so I could make some mouldy cheese beside the rat.
I baked them, and happily the larger one also puffed up bigger on one side, which made it easy to orient with that part at the back.

Normally a tiered cake would involve leveling but in this case I wanted that extra roundness. Don’t be afraid to use what’s normally a problem to your advantage when making weird cakes!
I did cut the swollen part off of the top of the larger one at first so I could put some red-tinted buttercream in there, put it back on, and then trimmed the sides as shown in the photo below, with blue lines representing the original edges.

I took out wedges from the sides to shape the body and head, plus curved the back end.
I then put some of those larger cut-offs on top as well with more buttercream to round out the entire shape.

I wouldn’t dare have such chunky cake in a case where structure mattered, but for a low, wide cake like this, it works. Plus very few kids complain about getting extra icing in their piece.
Then I covered the whole thing with buttercream and stuck it in the fridge to firm up. That made it very stable so I could then safely cut a hole into the head and neck for the blood capsule, which I tried to shape to the cake somewhat with that pointed tip.

I tried to keep what I carved out somewhat intact to be put back in, plus I had to resist eating it. Always remember: don’t eat any cutoffs until after you’re sure you don’t need them!

I had to shave some of the sides of the blood capsule off (you can see the offcuts in the lower left corner) to get it to fit, but once I got it in it was held snug in there which I knew would help keep it from shifting when cut.

Then I put some of that stuff I’d removed back in and packed it down a little.
After reassembling the neck, I put another layer of buttercream over it and put it back in the fridge to firm up again.
Meanwhile, I assembled the cheese cake by cutting the smaller diamond cake in half, stacking it with white buttercream, and then cutting it down in a slope. I covered it in more buttercream, then chilled it as well. Once it was firm, I used a melon baller (which has never actually been used on a melon since that’s a ridiculously wasteful way to serve melon) to cut out some holes.

I’m not usually a big fan of cheesecake but this works for me!
Once the rat cake was solid again, I applied one more thin coat of buttercream to level everything out and be able to carve in some underlying detail such as the leg folds. Doing this under fondant really helps shape the fondant later on a carved cake. I also completely cleaned up the board during this stage so there’d be no stray crumbs or buttercream to get in my way on the next steps.

You can start to see the rat shape at this point, which is important because you don’t want to leave too much sculpting to the fondant or else it’s harder to get a natural, smooth look to the overall piece.
I popped it back in the fridge one more time while I rolled out some red fondant, having measured the widest points of the cake with a measuring tape so I knew my minimum sizes. Then I brought it back out and because it was humid, the condensation was enough to stick the fondant on. On a dry day, I may have lightly spritzed the buttercream with water after getting hard in the fridge, just to ensure adhesion.

I decided to go with a red fondant for the main layer and then add skin that could be peeled back on top of it. This uses more fondant than just going with one colour and adding inserts where necessary, but I think it provides a better overall look. I rolled the fondant fairly thin knowing there’d be layers.
Once the fondant was put over the cake, I used my hands to smooth it to the pre-existing curves, including using the sides of my hands to form leg indentations. Again, I knew I’d be covering those with more stuff later, but building your cake structure from the inside out pays off in overall styling later.
I likewise covered the cheese cake with yellow fondant and put it in place. I left it off of the board until I had the rat covered because I know my weaknesses in terms of carrying large sheets of fondant over cakes and decided to minimize my pain and trauma by having the cheese cake completely out of the way until I had the rat covered and stable.

If your carved cake doesn’t at least vaguely look like what you want it to be at the end at this point, you’re going to have difficulties later. Take the time to get this stage right.
Next I marbled a bit of black food colouring into some purple fondant and rolled that extremely thin in sheet sections to cover the entire rat, sticking it to the red with a light brush of water. Then I quickly went around and cut/picked bits of this skin away, leaving ragged flaps and gashes all over. I then went back over those to drizzle a bit of the fake blood.
I sculpted some grey-green modelling chocolate feet, including some missing toes with little protruding white fondant bones. I rolled a tail out of that modelling chocolate as well and put it into place, using a knife to score lines all the way down and then hack out a couple of wounds. I made a green fondant nose, black fondant eyes (with one falling out of its socket on the end of blue and red entwined veins/nerves), and grey-green modelling chocolate ears. The technique for getting the ears thin at the ends is the basic petal-edging technique with a ball tool, which to this day I’ve never actually used for a petal. Heh.
I poked some wounds into the ears as well, and shaped a couple of protruding spine bits for the top, plus the exposed ribs on the other side, and tucked those into the skin folds.
I also hacked at the skin with a knife to make a sort of fur pattern, because I wasn’t actually 100% certain at this point if I was going to pipe on fur or not. I decided the hack-job fur wasn’t good enough, but it did make for a good messed-up zombie skin under the fur later.

Drips of blood were allowed to pool wherever they naturally fell, which really added to the whole look.

I also stuck on buck teeth and a protruding tongue.

I knew I wanted exposed ribs from the start and was pretty happy with how nasty they turned out.
Since I decided it did need more fur, especially to help it look mangey, I used the grass tip with grey royal icing to put batches of fur in varying length all over, frequently ensuring that some strands hung down over open wounds to give it a more naturally matted look.

Sometimes it pays off to have terribly uneven piping skills.
Once that royal icing was firm, I airbrushed the whole thing to give the fur realistic tones and texture. I hit it with purple, grey, green, and a bit of brown in varying layers. After, I used a wet brush to clean the airbrush paint off of the exposed bone bits, and the remnants on the edges made for subtle highlighting. Where necessary, I also dripped more blood to clean off any excess airbrush paint.

I wanted this thing to look gross and diseased, so I really pumped up the green and purple.
Likewise, I airbrushed the cheese. First I hit it with some white to make it look more cheese-like, then I added mouldy patches of blue, green, and purple. I ran some brown around the base for some shading, then repeated the various colours as necessary for even blending.
Voila, the finished cake!

“I wish my mouth would stop bleeding so I could eat my cheese!”

Adding a small dot of white to eyes – especially when they are dark – really highlights them.

I consider this the “back” of the cake, but it’s important to never really have a true back on any cake that will be seen on all sides, which is fairly common, particularly for birthday cakes. Make sure every kid around the table has something interesting to look at.

Not a lot of decorative cakes call for the mouldy look. This was too much fun by far, and really not very difficult with the airbrush. If I didn’t have the airbrush, I’d have painted some white onto the yellow cheese, then made fondant mould patches of blue and green marbled roughly. I would have textured those with a gravelly mat and fixed them to the cheese. That would have been okay, but more cartoony.

The “back” of the cheese with some particularly nice mouldy stains.

Here it is in natural light just before delivery.

Face detail showing the holes in the ears. Modelling chocolate allows for that more easily without risking breakage. Those would have been pretty fragile in gumpaste, but in modelling chocolate they were quite sturdy and could be adjusted as necessary.

Detail of the foot with the protruding toe bone.

Detail of the exposed ribs.

De-tail.
Of course I had to deliver the thing intact so I wasn’t there to see if it bled or not. Thankfully, the recipients sent a video of it being cut, during which children and adults equally squeal, groan, and shout, “Ewwwww!”, all of which made me cackle insanely as I watched. But it’s a private video so I can’t share it. However, it did definitely bleed, and an unexpected bonus of having used white modelling chocolate (which I meant to tint red but forgot…I mean…I did that on purpose, yeah!) was that it was perceived as bone, especially as it came off of hollow disks. So disgusting, so awesome!
Here are some non-personal screencaps from the video:
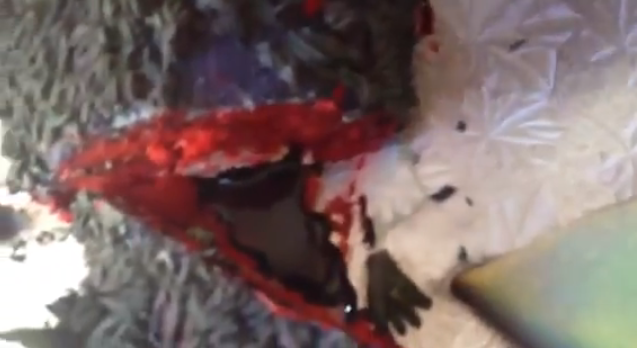
First blood always tastes the best.
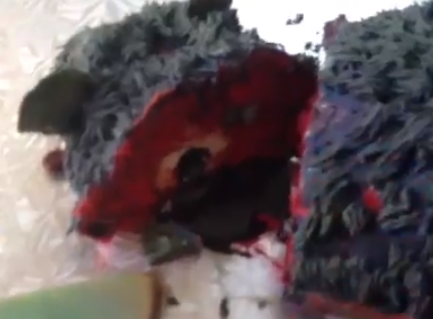
Yeah, I totally meant for that to look like a severed, bleeding spine or throat or something. Sure. Yup. Go with it.
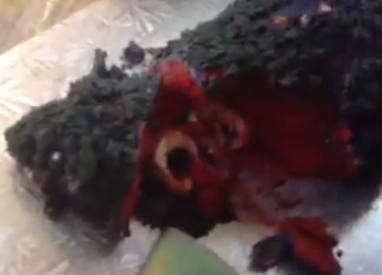
See how that sliced bit of the capsule totally looks like a hollow vertebrae? Yeah, I had no idea that would happen. WOOT!
So there you have it: you too can make a bleeding cake. You could certainly run a modelling chocolate tube all through a cake so it would bleed if cut at any point, and modelling chocolate would give better flexibility for that with less likelihood of early leakage. You could make an entire set of entrails stuffed with all manner of gooey colours to erupt when sliced. Ewwww. Heh heh heh…
If you make something wonderfully disgusting based on this, post a link to your photos in comments!




I've long wanted to put a blood capsule of some sort (I was thinking bigger, with entrails of jello jigglers) in an Easter lamb cake.
Dooooooo it!
And make the jigglers gummy instead and they'll be more solid in there. Get any kind of food-safe long tube and cast some gummy in there, pull it out, and wrap it around as entrails. Then send me pictures because of the severe AWESOME.
Absolutly Amazing work. I love it. thanks for posting this.
This is so delightfully gross. I would have loved a cake like this as a kid–mostly because my mom would have HATED it. (I’m not sure if the “bleeding zombie” part or the “rat” part would put her off more.)
I’d probably want to try something like this myself in the future, but maybe a bit more cartoony and a bit less realistic. Maybe a zombie foot with fake “leg bone” sticking out the top.